
Pão de Queijo: The Little Cheese Bread That Tells the Story of Brazil
The history of Brazil's beloved cheese bread, the coffee ritual around it, and 4 recipes: traditional, blender, lighter and gluten-free.
- receitas
- cozinha
- família
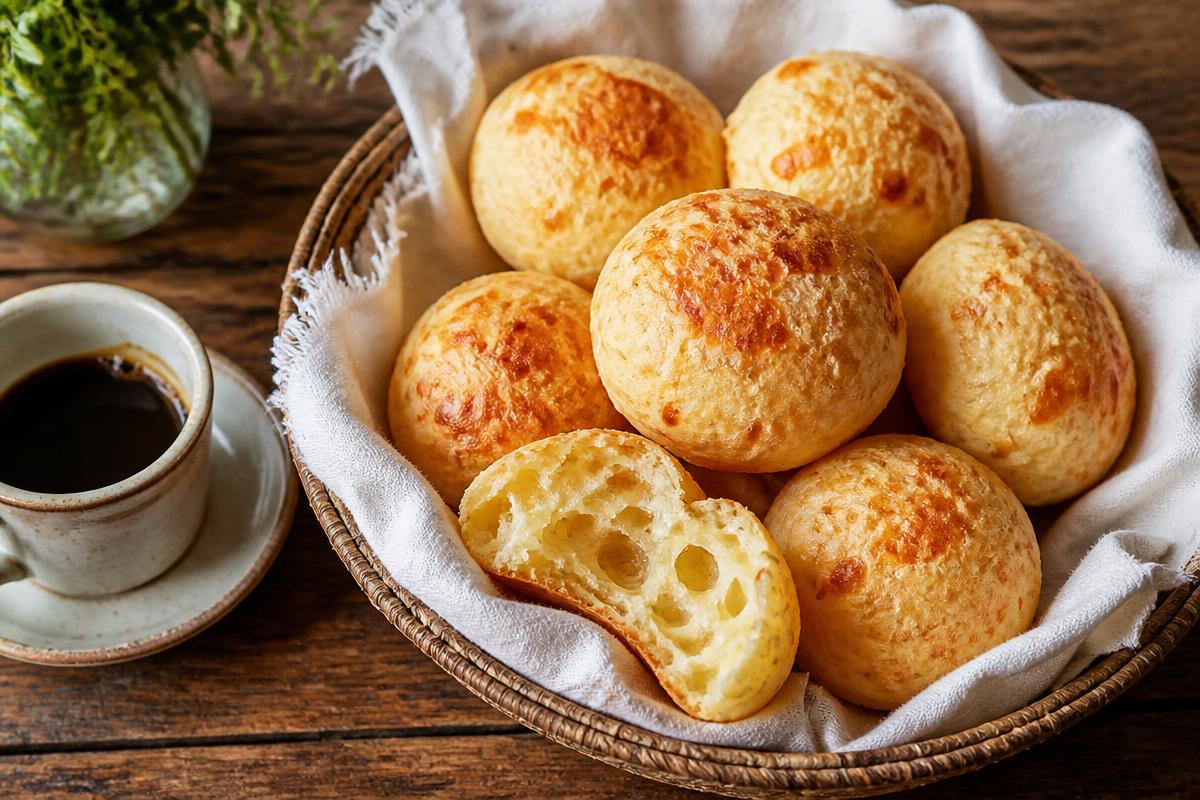
There are foods you eat, and there are foods that feel like a hug. Pão de queijo — Brazil's beloved cheese bread — is firmly in the second category. Crispy and golden on the outside, impossibly chewy and cheesy on the inside, these little rounds have a way of disappearing from the basket before they've even cooled.
But behind that humble appearance is centuries of history, a story of resourcefulness, and — surprise for many readers — a treat that has been naturally gluten-free since long before "gluten-free" was a thing.
Grab a cafezinho. Let's dig in.
A bite of history: born in Minas Gerais
Pão de queijo's story begins in the state of Minas Gerais, Brazil's mountainous heartland, sometime in the 18th century. The version most food historians tell goes like this: wheat did not grow well in colonial Brazil, and imported wheat flour was scarce and expensive. What the region did have in abundance was cassava (mandioca), a hardy root that Indigenous peoples had cultivated and processed for centuries.
From cassava came polvilho — a fine, silky starch — and it was enslaved African cooks working in the kitchens of Minas Gerais farms and fazendas who first transformed it into small baked rolls. Early versions were often made with just starch, water, and fat, since cheese and milk were reserved for the landowners' tables. As the region's dairy culture flourished in the 19th century (Minas remains Brazil's cheese capital to this day), leftover scraps of the local cheese found their way into the dough — and pão de queijo as we know it was born.
It's a dish built from three cultural threads woven together: Indigenous knowledge of cassava, African culinary skill, and the dairy traditions that took root in Minas. In other words, it's Brazil in edible form.
For a long time, pão de queijo remained a homemade, regional treat. It exploded nationally in the second half of the 20th century, helped along by urbanization, bakeries, and eventually frozen versions that let anyone bake a batch at home. Today you'll find it everywhere from São Paulo padarias to specialty cafés in New York and Tokyo.
The culture: more than a snack
To understand pão de queijo, you have to understand the ritual around it. In Brazil — and especially in Minas Gerais — it's inseparable from the café da tarde, the afternoon coffee. A plate of warm pão de queijo, a thermos of strong coffee, family or neighbors around the table, and conversation that stretches into the evening. Mineiro hospitality is famous, and this is its edible ambassador: the first thing offered to any guest who walks through the door.
It's breakfast food, road-trip food (every gas station bakery in the interior sells them), office-meeting food, and comfort food for homesick Brazilians abroad. Ask any Brazilian living overseas what they miss, and pão de queijo is almost always near the top of the list — usually mentioned with a wistful sigh.
There's even a date for it: August 17th is celebrated as National Pão de Queijo Day in Brazil.
Before you bake: know your polvilho
The soul of pão de queijo is polvilho, the cassava starch — and it comes in two types:
- Polvilho doce (sweet/regular cassava starch): neutral flavor, produces a softer, more uniform crumb.
- Polvilho azedo (sour cassava starch): naturally fermented, gives the classic tang and that airy, chewy interior with a crisper shell.
Traditional recipes often use both, or lean on azedo for authentic flavor. Outside Brazil, look for "tapioca starch" or "sour cassava starch" in Latin American markets or online — plain tapioca starch works as a substitute for polvilho doce.
For the cheese, tradition calls for queijo minas meia cura (a semi-cured Minas cheese). Abroad, a mix of parmesan (for sharpness) and mozzarella or a mild white cheese (for stretch) gets you beautifully close.
Recipe 1: Traditional pão de queijo (the way grandmothers make it)
This is the classic scalded-dough method — a little more effort, maximum reward.
Makes about 30 small rolls
Ingredients:
- 500 g polvilho (ideally half doce, half azedo — or all of one type)
- 250 ml whole milk
- 100 ml water
- 100 ml vegetable oil (or half oil, half melted butter)
- 2 large eggs
- 250 g grated cheese (meia cura, or 150 g parmesan + 100 g mozzarella)
- 1 teaspoon salt (reduce if your cheese is very salty)
Method:
- Put the polvilho and salt in a large bowl.
- Bring the milk, water, and oil to a boil in a saucepan.
- Pour the boiling liquid over the polvilho and mix with a spoon. It will look lumpy and strange — this scalding step (escaldar) is what creates the chewy texture. Let it cool until just warm to the touch.
- Knead in the eggs one at a time (hands work best; the dough is sticky — embrace it), then knead in the cheese until you have a smooth, elastic, slightly tacky dough.
- With lightly oiled hands, roll into balls about the size of a golf ball and place on a parchment-lined tray with space between them.
- Bake at 180 °C (350 °F) for 25–30 minutes, until puffed and golden. Do not open the oven in the first 20 minutes.
- Eat warm. Attempt to share.
Tip: The raw balls freeze beautifully. Freeze them on a tray, bag them, and bake straight from frozen (add 5–10 minutes). Future you will be grateful.
Recipe 2: Quick blender pão de queijo (weeknight hero)
No scalding, no kneading — everything goes in the blender. The texture is slightly lighter and more custardy inside, and it's ready in under 40 minutes.
Makes about 12 (use a muffin tin)
Ingredients:
- 1 cup milk (240 ml)
- ½ cup vegetable oil (120 ml)
- 1 egg
- 2 cups polvilho or tapioca starch (about 240 g)
- 1 cup grated parmesan (about 100 g)
- ½ teaspoon salt
Method:
- Blend the milk, oil, egg, and salt.
- Add the starch and blend until smooth, then pulse in the cheese briefly.
- Pour into a greased mini-muffin or muffin tin, filling about ¾ of the way.
- Bake at 200 °C (400 °F) for 15–20 minutes until puffed and golden.
Perfect for when the craving strikes at 7 p.m. on a Tuesday.
Recipe 3: The healthier take (lighter, with a nutritional boost)
Let's be honest: pão de queijo is never going to be a salad, and that's fine. But this version cuts the oil substantially, uses lighter dairy, and sneaks in cooked sweet potato — a trick popular with Brazilian fitness cooks — for fiber, vitamins, and natural moisture.
Makes about 15
Ingredients:
- 200 g cooked, mashed sweet potato (or regular cassava/squash)
- 200 g polvilho or tapioca starch
- 1 egg
- 2 tablespoons olive oil
- 100 g light mozzarella or reduced-fat white cheese, grated
- 2 tablespoons grated parmesan (flavor insurance)
- ½ teaspoon salt
Method:
- Mix the mashed sweet potato with the egg, olive oil, and salt.
- Add the starch gradually, mixing until a soft, moldable dough forms.
- Fold in the cheeses.
- Roll into balls, place on a lined tray, and bake at 180 °C (350 °F) for about 25 minutes until golden.
The result is slightly denser and subtly sweet — wonderful with coffee. For a dairy-free version, swap the cheese for 3 tablespoons of nutritional yeast plus a pinch of extra salt; you lose the stretch but keep a lovely savory flavor.
Recipe 4: Gluten-free — the beautiful plot twist
Here's the part that delights every celiac and gluten-sensitive reader: authentic pão de queijo is already 100% gluten-free. Cassava starch contains no gluten at all. While the rest of the world scrambles to reinvent bread without wheat, Brazil quietly solved the problem three centuries ago.
So the "gluten-free recipe" is simply... any of the recipes above, with two practical caveats:
- Check your starch label. Buy polvilho or tapioca starch marked gluten-free to avoid cross-contamination from facilities that also process wheat.
- Beware of shortcuts. Some industrial or bakery versions add wheat flour to cut costs — always ask or read the ingredients. Homemade is the safest (and tastiest) route.
If you're baking for someone with celiac disease, also use clean utensils and trays that haven't just handled wheat flour. That's it. Serve warm and watch someone who hasn't eaten "real bread texture" in years light up.
How to serve it (and what to drink)
- Classic: warm, with strong black coffee — the sacred pairing.
- Café da manhã style: split open with butter, or with requeijão (Brazilian cream cheese) if you can find it.
- Modern café style: sliced and stuffed with ham, or served alongside scrambled eggs.
- Party trick: make them marble-sized and serve as appetizers with a glass of wine — they vanish at a rate science cannot explain.
Troubleshooting: pão de queijo SOS
- They spread flat: dough too wet, or oven not hot enough. Add a bit more starch and make sure the oven is fully preheated.
- Too dense: usually skipped or rushed the scalding step in the traditional recipe, or too much cheese packed in.
- Not chewy enough: try adding or increasing polvilho azedo — that fermented starch is where the signature chew lives.
- They deflated: you peeked. The oven door stays closed for the first 20 minutes. This is the law.
One last thing
Every Brazilian family has "the" recipe — the aunt whose pão de queijo is unbeatable, the grandmother whose exact cheese ratio is a guarded secret. Recipes are passed down on stained index cards and in voice messages, and arguments about polvilho doce versus azedo can get genuinely passionate.
That's the real magic of this little bread: it carries history in its ingredients and love in its making. So bake a batch, pour the coffee, and invite someone to the table. That's the most authentic way to eat it.
Have you tried making pão de queijo at home — or do you have a family recipe with a secret twist? Tell me in the comments. And if you're team polvilho azedo, you're welcome here.
Get new activities every week.
No spam. Just good ideas for you and your little one.